

Posts Tagged: container
Recipe for Bulb Lasagna
In spring, a cheerful pot of blooming tulips by the front door can snap dreary winter to a close. The bright colors and jaunty stance of springtime’s most famous flowers signal milder days ahead.
Fall is when spring blooms are planted. But why settle for just tulips, when you can also enjoy daffodils, crocus, and grape hyacinths planted in the same pot to produce three waves of bloom, brightening your spring scene for weeks and weeks on end?
The Technique
The technique is called layering or planting lasagna-style. It involves planting layers of different types of bulbs in the same pot, with the various types blooming in secession. By overlapping their bloom times you can create pots of seemingly “perpetual color” featuring double-decker and two-tone color effects.
To enjoy the dramatic display, put layered pots where you’ll see them daily: by doorways, next to the garage or driveway, by the mailbox or lamp post, along walkways or right outside your kitchen window. Spectacular!
The instructions feature crocus, daffodils, grape hyacinths and tulips as the early, mid and late blooming bulbs, but any early-mid-late combo that pleases you will work.
Color & Texture
When selecting bulbs, consider their flower color, as your Lasagna simmers from one planting to the next, having different flower colors adds a sense of “newness” as the waves of color progress. Likewise, there is delightful textural value to each plant, including flowers and leaves. As the bloom progresses, you will be left with leaves from the previous bloom. They may be fine and short like grass or long and strappy, thick and leathery. Having a variety of textures will leave your container with more interest, but also urges you to think, how could I have done this and not hidden my beautiful crocus with leathery leaves.
Planting Bulbs in Layers, Lasagna-style
For three waves of bloom, you’ll need bulbs that bloom in early-spring, mid-spring, and late-spring. Different types of flower bulbs bloom at different times. Bulb packages list this information on the labels. When making bulb selections, consider choosing bulbs with overlapping bloom times so that the planting remains colorful all season. Include grape hyacinths in the mix, for instance as they bloom for weeks on end, providing a colorful cobalt blue under-planting to mid-season daffodils, and continue to bloom in support of the late-season tulips, as well.
Minimize Cold, Wind Exposure
In choosing a pot, the larger the better so as to provide added insulation to the roots. In colder climates, freezing can be an issue so you may need to place your pot(s)in protected areas away from extreme cold and wind (against a house foundation, on a porch, or deck where they receive “radiant heat”, for instance).
Choose Early, Mid, Late Blooming Varieties
Excellent bulb choices for layering would be crocus (early-season), daffodils and grape hyacinths (mid-season), with the same grape hyacinths still there in bloom with the tulips (late season). The cobalt blue grape hyacinths (aka muscari) are the “glue” that hold this particular scheme together, by virtue of their extremely long bloom season.
Positioning the Bulbs
- Pretend you are making lasagna! You’ll plant the largest bulbs approximately 8-inches deep, smaller bulbs 5-inches deep. Potting soil provides the layer (the sauce) under and over your bulbs.
- The Sauce (potting soil) is now added, about 2”-3” deep, so when you measure from the top rim of your pot down, the potting soil level should be about 11 inches below the rim. Sprinkle on a fistful of bonemeal.
- The 1st layer will be a bulb such as a large size (king Alfred) daffodil, allium, or tulip. Place your bulbs in tight so you’ll have quite a color show. Or you can mix them up or in a pattern.
- The Sauce - Add 3” inches of soil above the first layer. Sprinkle on a fistful of bone meal.
- The 2nd Layer will be a bulb that is planted about 6” below the surface such as Dutch Hyacinth or a jonquil narcissus. Leave about ¼” between them.
- Don’t overcrowd, remember these bulbs are fairly well dehydrated and will swell once watering begins!
- The Sauce – Cover with about 1” inch of soil above the previous bulbs. Sprinkle on a fistful of bone meal.
- The 3nd Layer will finish your container off with bulbs like grape hyacinth (muscari) and/or crocus. Remember to leave a little space in between bulbs.
- The Sauce – Top off with five inches of potting soil, add some pansies or other colorful cool weather annuals.
- The Cheese- (mulch) Top dress your creation with mulch, water regularly and wait for the show.
Let the Show Begin
As spring arrives, sit back and watch the show as the waves of colorful flowers come up, bloom and move on.
As each wave blooms, then fades and dies back, that wave’s leaves will remain. Crocus leaves are attractive, slim and grass-like, just let them be. Daffodil /Jonquil leaves are also nice but you may want to snip off the faded flowers and stems to the leaves. Tulips can be the grand finale if you late blooming variety, which is a good thing as fading tulip leaves are unattractive.
Once the last ones fade, it is time to dig up the whole lot and replant everything in the yard or garden in a less-than-primetime location or just put the whole container somewhere out of sight but still being watered until foliage turns brown. Bulbs use their leaves to absorb nutrients which are stored in the bulb itself. If you cut the leaves off too soon, they will not have the energy stores to flower again next year. After all foliage is brown, it’s time for hair cut and decisions for your bulbs future. Daffodils, crocuses and grape hyacinths are bulbs that naturalize well and can be easily planted in the yard where they do not get much water. If you choose a well-drained, sunny spot to replant these bulbs, there’s a good chance they’ll come back in future years to bloom again and even multiply.
Don’t be tempted to leave the bulbs in the same big pot if summer flowers will be planted in it next. Routine watering and fertilizing for summer flowers will damage/rot bulbs. Bulbs originate from areas that have harsh winters and hot waterless summers. Better to plant them into the ground, along a path or in a bed just for bulbs, this way come fall, you can gear up, fertilize them and get them back on the road to bloom again
Fertilization
Both spring and summer bulbs need phosphorous to encourage root development. Keep in mind that phosphorous moves very little once applied to the soil. Some bulbs are planted 6 to 8 inches deep. The phosphorus needs to be mixed in the soil below where the bulbs will be located so it can be utilized by the bulb roots. Mix bone meal with the soil in the lower part of the planting bed as it is being prepared.
If bulbs are going to be maintained in a planting bed more than one year, it is important to supply additional fertilizer bone meal each autumn. Spring flowering bulbs should have mixed into the soil in the fall five tablespoons of 10-10-10 soluble fertilizer (or equivalent bulb fertilizer) plus two cups of bone meal per ten square foot area. With the arrival of new shoots in the spring, repeat the above soluble fertilizer application. Do not fertilize spring flowering bulbs after they have started flowering. This tends to encourage the development of bulb rot and sometimes shortens the life of the flowers.
Summer and fall flowering bulbs should be fertilized monthly from shoot emergence until the plants reach full flower. Apply seven tablespoons of 10-10-10 soluble fertilizer (or equivalent bulb fertilizer) split over two or three applications over a ten square foot area.
For good bud development, work bone meal into the soil at planting and check your soil ph twice a year and adjust as necessary.
Color Bowl
Recently I was walking through one of the home improvement warehouse stores and I noticed that color bowl’s are back in season. A color bowl is a container of almost any size or shape filled to the brim with many different kinds of flowers. These container displays are perfect on a front porch, in a courtyard, or virtually anywhere you want to spruce up and add color instantly around your home. I thought to myself that I could probably create myself a few color bowl’s relatively inexpensively by piecing them together instead of purchasing the pre-fabricated version the store was selling. I decided to do just that. I already had 4 matching 5 gallon containers at home earmarked that would be perfect to fill with colorful plant life. All I needed was to get some good quality potting soil and choose some foliage and flowers that I enjoy. I meandered back to the bagged potting soil and found several choices that could offer a fertile home for the roots of my selections and supply them with needed nutrients in order to thrive all summer. I decided on a potting soil specific to container gardening that already contained about 2 months worth of organic fertilizer in the mix. Then I was off to the outdoor garden department for some six packs of flowers and some 4 inch “center piece” flowers. Out the door, I spent about $15 and I had all the ingredients for 4 full color bowls. The color bowls the store was selling were priced at $13 each so I figured that I will save about $35 in total with my project. I took my purchases of three 6 packs, four 4 inch flowers and the soil home, sunk my hands into some gloves and got to work. I filled the containers slightly more than half-full with the soil mix and I arranged an outer circle of 4 smaller flowers with a 4 inch flower in the middle as a risen center piece. I placed the flowers into the container the way I liked, leaving some space in between all of them to be able to fill in as they grow. Next, I gently filled in the container with more soil so that all the flowers were firmly planted. I watered each bowl lightly and placed the containers on my porch to get full sun. A key to success with this project is to make certain you get the right flowers for the location you intend to place your color bowl (sun versus shade). I find that I am watering my color bowl only twice a week and after 2 weeks they have really taken off.

My color bowls. (photo by Ed Walbolt)
Salad Bowl
Want an easy project that keeps on giving? How about a salad bowl garden. I saw a very nice example of this easy garden the other day sitting next to my neighbor's front door.
Last October Connie re-purposed a succulent clay pot into a perpetual salad bowl. She
likes mesclun salad greens but not the price. So for a small amount of time and a couple packets of seeds, she created a miniature habitat for growing these garden beauties. Her round clay pot measures about 10 inches across and 4 inches deep. She cleaned her pot and added a mixture of half potting soil and half compost. Fortunately she has a husband who is an active composter, so there is a good supply at hand. She dusted the seeds across the surface and pressed them gently into the soil and misted the surface. She then placed an inverted clear plastic pot liner across the top of the pot to keep the birds out and
to help maintain moisture and heat for the sprouting seeds. She placed her pot in a sunny place in her backyard and since it was still pretty warm in October she checked the moisture level frequently and misted the surface as needed. Within 10 days she was rewarded with tiny shoots of lettuce. When she harvests the lettuce she leaves a couple of inches of growth and the individual plants soon send up new shoots. She reseeded this pot mid-December by gently dimpling the surface with a chopstick and dusting in more seeds. She also moved her pot to the front garden for better sun exposure during the winter. Connie's effort has been rewarded with a nice supply of gourmet greens. The latest Baker Creek Heirloom Seed catalog (http://rareseeds.com/), Renee's Garden (http://reneesgarden.com/) and Peaceful Valley Farm (http://www.groworganic.com/)have a variety of lettuces and greens seeds available for about $3 a packet. Enjoy.
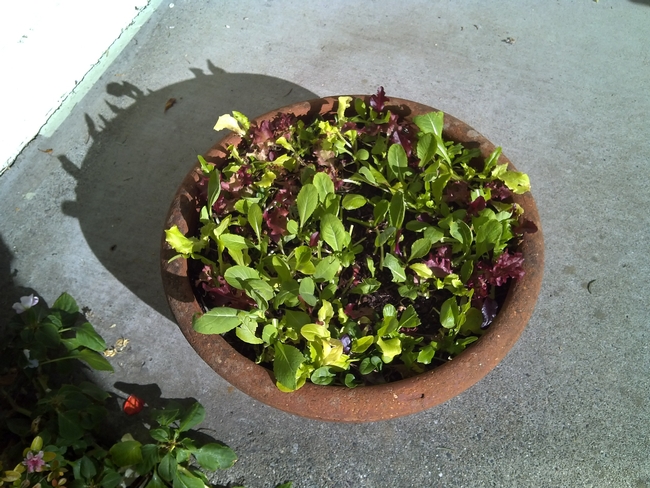
Salad in a bowl. (photo by Trisha Rose)
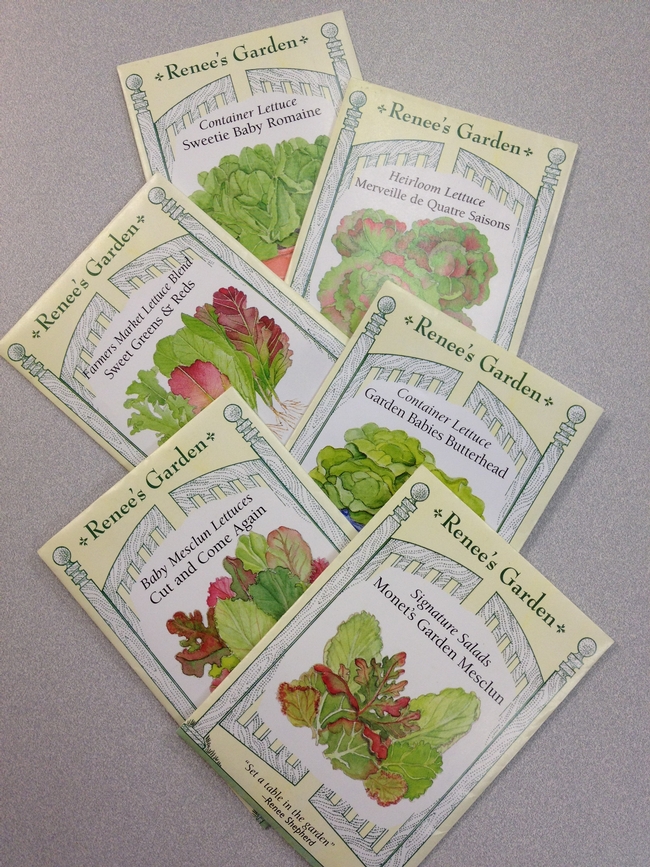
Seeds for a variety of lettuces. (photo by Jennifer Baumbach)
