

Posts Tagged: raised beds
Edibles in Your Landscape
The concept of edible landscaping has been growing in popularity for the last few decades. It proposes that we integrate edible plants into our regular landscape design and plantings. Its proponents argue that since plant-able soil is at a premium for many people, using all our space makes sense. They also point out that in addition to helping us eat healthier by growing some of our own fruit and vegetables, many of these plants are downright pretty.
I found myself on the flip-side of edible landscaping the last few years. I have two raised beds, six by six feet in my back yard that I have grown herbs and vegetables in for years. Several years ago I bought some dahlia tubers at the San Francisco Garden Show. When I got them home, I realized I didn't know where I could plant them. Front and side yards all had established plantings that weren't amenable to some potentially four foot neighbors. I decided to put them in the very back of my raised vegetable beds. Over the years, I got a few more varieties. I thought the foliage and flowers made a nice backdrop for my vegetables.
Then I saw some corms for the most beautiful two-toned gladiolas. I tried a few in the front yard but they kept getting blown over by the wind. The backyard seemed my only solution. I reasoned that since the leaves were tall but slender I really shouldn't have to worry too much about shading out my vegetables. I planted them in a big line right across the front of both raised beds.
The first year was beautiful and my plan worked well. Gradually though the gladiolas multiplied and I found myself with a thick wall of foliage last year. I tried pulling the foliage to each side of the tomatoes to try and let some sunlight in, but it was the worst year for tomatoes I had ever had.
After growing season, I dug up the gladiolas, gave some away and replanted some farther back in the bed in little clumps not solid rows. When it came time to put in the tomatoes this year, I placed them on the edges and right in front. This year the tomatoes are doing much better.
Just to let you know I am a firm believer in edible landscaping. In other parts of the yard I have a fig, a crabapple and an olive tree. I have pomegranate and pineapple guava shrubs and some smaller blueberry bushes. I have artichoke, and lavender plants and some herbal plants and ground-covers.
I love food and I love flowers. As long as we can give them the soil, the light, and the water they need, they will get along just fine.
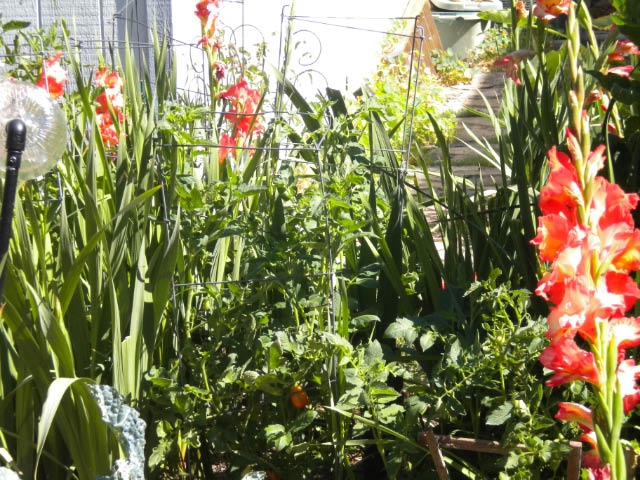
Gladiolus and tomatoes. (photos by Karen Metz)
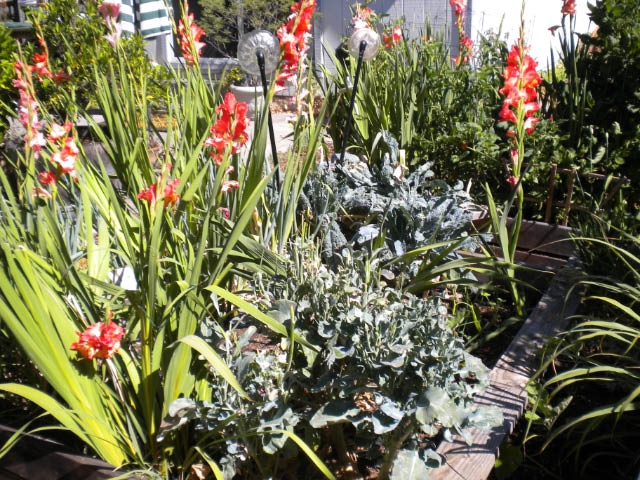
Glads and broccoli and kale.
Quick and Easy Raised Beds
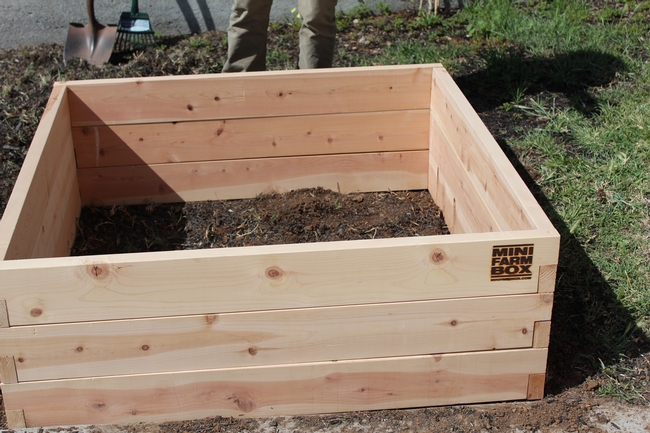
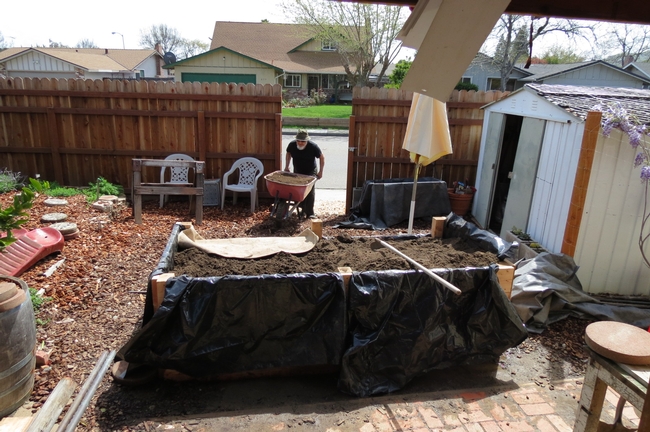
The March issue of Sunset Magazine has an article on growing productive gardens in a small back yard area, using 4x4’ pre-fabricated beds made of milled cedar boards. This inspired me to try it myself, and my partner and I designated a small sunny area on the north side of our lot next to a concrete patio. I ordered two of the 4x4’ beds, each with 6” height extensions, to make it easier to work. Minifarmbox.com is the source, and before long, a UPS truck stopped in front of the house, and brought the boxes containing the disassembled bed pieces to the front porch.
Just a few days ago, we put them together, and it was incredibly easy, taking only about 10 minutes per box. The corners of the boxes have small holes for metal rods, which hold everything in place. Disassembly should be likewise an easy task, in case we change our minds about the location of the beds.
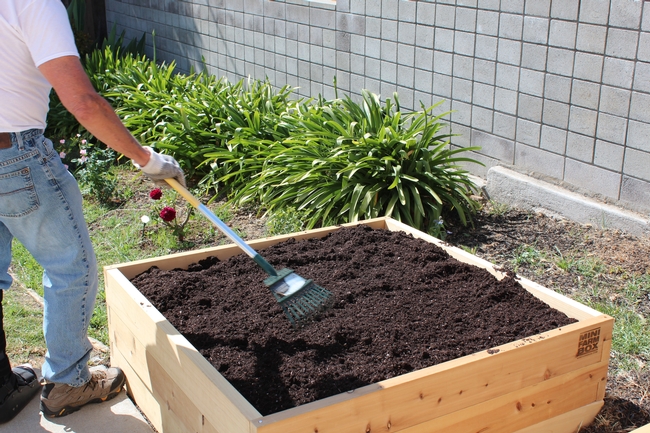
Next, we filled the completed boxes with potting soil, which I got at discount at a local “big box” store. I prefer the one cubic foot bags because they are easier to handle, and I prefer to use potting soil because it is so easy to work. In fact, you can harvest potatoes by sticking your hand down into the soil around the plant without damaging it or to see if they are big enough. To this, I can add home grown worm compost, which will add to the richness. And, should the dreaded Bermudagrass (Cynodon dactylon L.) appear, you can reach very far down with a trowel to get to its intrusion point.
Each box needed 18-20 bags, depending on how close to the surface you like to have the soil level. (I used 20 bags.) I also ordered customized irrigation systems for each bed (again, minifarmbox.com), which will go in after the veggie starts are in. During the winter the top extension boards, once removed, will expose the corner pins, which can serve as anchors for a PVC pipe frame for a plastic-covered hot house. But for now, we look forward to months of leafy greens and summer veggies from these beds.
See also, Mel Bartholomew’s book, The New Square Foot Garden Book, which lends itself to close planting in a small, intensely worked area, perfect for these small beds.
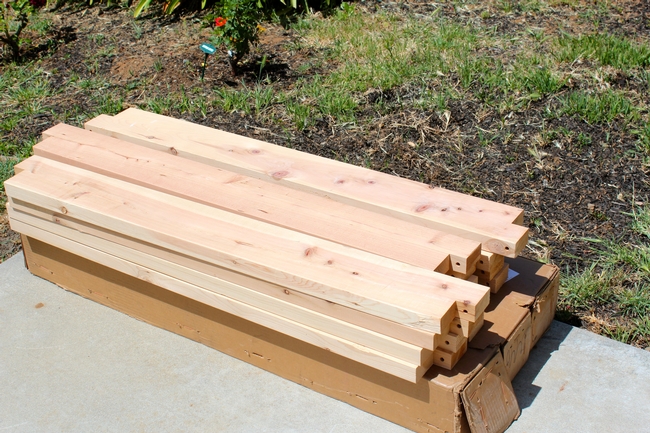
The materials for the Mini Farm Box. (photos by Bud Veliquette)
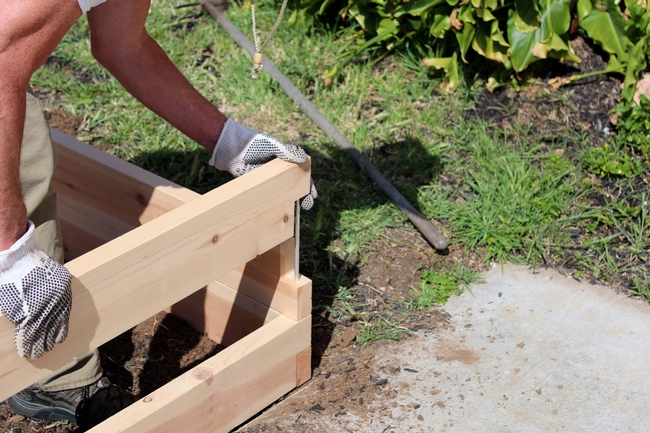
Assembly of Mini Farm Box.
Adding the soil.
Almost there, it just needs plants now.
Sorry Ladies!
Back in February, I wrote a blog that was a bit of a love letter to our three hens. Today we planted our tomatoes, so the love story has, sadly, come to a screeching halt.
This year’s tomatoes went into one of two raised beds, which have sat fallow for two years. I have always had to create a “dome of protection” with bird netting over the raised beds, as they abut a large open space where coveys of hungry quail lurk. And now we have to worry about our hens raiding the garden boxes, too.
Bird netting is hateful stuff. It catches on everything — branches, leaves, earrings, eyelashes. We wanted to make our lives easier, when it comes to bird netting, by building semi-permanent frames onto which we could wrap netting. I found a thorough online description for building PVC frames, and the construction began.
Our two raised beds are 4 feet by 10 feet. We started out making one rectangular frame to fit over the top of the beds. This was unwieldy to build, and would be too heavy and wobbly to move out of the way for harvesting and such. My husband decided to construct two frames, 4 feet by 5 feet each, and they went together much more easily. The beauty of two frames is they’re light. I can raise one half of the cover to harvest, add mulch or pull weeds. Knowing how tall indeterminate tomatoes can become, we plan to make two more frames that will stand taller. For now, the 3-foot height is fine.
Our hens are a bit miffed. They saw us put in the tomato seedlings this morning, and rushed over to gobble up those sweet new leaves. After much shooing and distracting with fresh, wormy piles of compost thrown their way, my husband and I were able to cover our new plants with our new frames. I’ll keep you posted on how well they work.
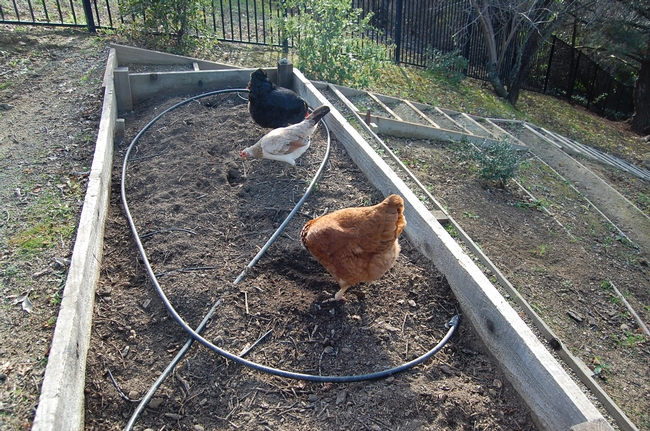
In February, our three hens were welcome to forage in the fallow raised beds. photos by Kathy Thomas-Rico
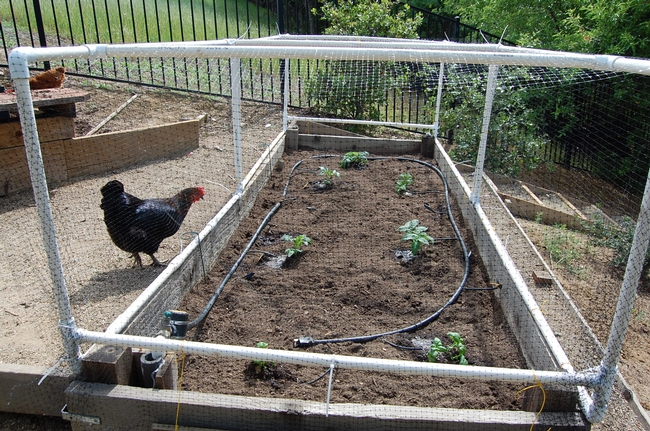
The newly planted bed, with new bird-netting frames, is no longer as welcoming to the hens and local quail.
What Do You Want for Your Birthday?
Several women I know asked for jewelry, cruises or trips to Las Vegas; but I asked for raised beds. Walking around the backyard I picked out a good spot -- taking in consideration the hours of sunlight -- my husband and I visited the various box stores in the area. Redwood was chosen because of its ability to last longer. Our measurements were six feet long, four feet wide and 22 inches high. The height was important to both of us because we are in our seventies and don't bend and stretch as easily as we used to.
We lined the box sides using staples to keep the soil from leaking out between the planks. After doing the math we ordered three yards of special soil mixed especially for raised beds. In addition, I incorporated four bags of dried chicken manure from a local organic chicken farm.
We enjoyed a bounty of vegetables, greens and herbs and I was amazed at how well plants grew in a raised bed. I found it very interesting that beneficial insects easily found the plants growing in a high rise environment, but the troublesome pests appear to have a more difficult time finding the plants. Very few problems.
The first raised bed we built provided us with strawberries throughout the season. I am still able to go out in the morning every couple of days and find a few small and delicious berries. I am now thinking of changing bed # 1 as a herb garden instead of having the herbs spread all over the yard.
How lucky I am to have a husband who indulges my 'crazy birthday ideas' -- that end up benefiting the both of us!
The beginning of the raised bed. (photos by Danielle Wilkowski)
Vegetables spilling out of the raised bed.
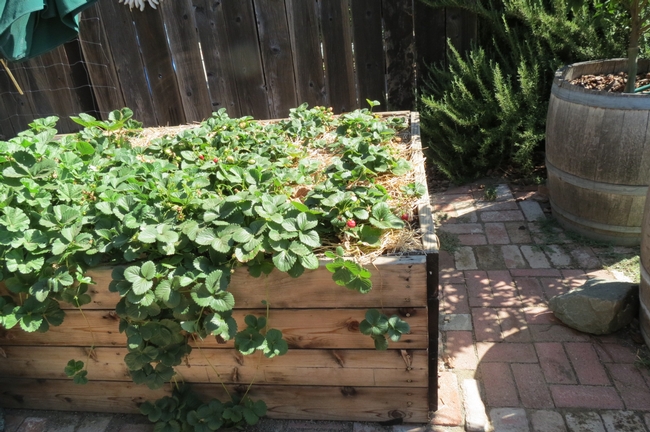
Yum! Strawberries!
Spaghetti Squash
It seems like every year there is one plant or crop that stands out, sometimes because of its success and sometimes because of its abject failure. This year the spaghetti squash has been the star of the show. I saved the seeds from a squash from a farmers' market and started them in little six packs. I was starting several other kinds of squash as well. This year's garden was slow to get started as we had a prolonged cool spring. By the time things started growing I had forgotten which squash was where. Most of the squash stayed politely where they had been planted, but the spaghetti squash took off running.
Soon it had grown through my tomato cages, escaped the bounds of my raised beds and started up the climbing roses. I would whack it back every now and then to leave room for the other vegetables. After it began flowering and setting fruit, I was amazed at the size of some of them. Some were like small watermelon. Now they have turned from green to orange instead of the expected yellow.

For those of you not familiar with spaghetti squash, it's a winter squash that when halved, seeded, and cooked, has flesh that can be separated into spaghetti like strands with a fork. Squash are famous for their ability to cross pollinate so I'm starting to wonder if there isn't a bit of pumpkin in this squash's background. I guess I won't know until I try and cook them.
When I went on the web to try and look up the proper timing of the spaghetti squash harvest, I had my first exposure to garden forum humor. When others had asked a similar question, the answers had ranged from when the water is boiling to when the meatballs are ready. Apparently the real answer is to let the color change from green to yellow and to wait til the skin thickens, hardens, and cannot be pierced with your fingernail. Then the squash will be able to be stored for months.
