Posts Tagged: mushrooms
Homegrown/Backyard Oyster Mushroom Cultivation
I recently attended a 4-hour workshop on homegrown/backyard mushroom cultivation organized by Biofuel Oasis in Berkeley, California. Patty and Ray Lanier of Mushroom Maestros located in both Oakland and in Lake County, California, were the featured speakers of this seminar.
The workshop began with a Powerpoint presentation on a brief history and folklore of the mushroom, the life cycle of a mushroom, and how mushrooms play a part in our ecological system. After the Powerpoint presentation, Patty and Ray led the group through some hands-on projects, which is the focus of this blog entry.
I was surprised to learn how easy it was/is to cultivate some varieties of mushrooms at home, specifically, the oyster mushroom and wine cap mushroom (king stropharia). Below are instructions on how to cultivate oyster mushrooms at home. Cultivating wine cap mushrooms is even easier and will be discussed in one of my upcoming blog entries.
Oyster Mushroom
Oyster mushrooms are aggressive and eager to grow.
Materials needed:
1. Large pot (e.g., a canning pot)
2. Large colander
3. Large mesh bag (e.g, an onion bag from the supermarket)
4. 1 bag of mushroom innoculent (can be bought on-line)
5. 1 cylindrical plastic bag (e.g., the plastic bags that newspapers come in or a large plastic bread bag)
6. 1 bag/jar of mushroom grain spawn (can be purchased easily on-line)
Step 1: Pasteurize (not sterilize) clean wheat straw (note: not hay, but straw) which you can purchase inexpensively from a well-stocked feed store, in 150 - 180 F degree heat for 45 - 60 minutes. It may help to place the wheat straw in a mesh bag like an onion bag, to keep the straw together.
Step 2: After you have pasteurized the straw, let it dry by placing it in a colander.
Step 3: Sterilize all work surfaces, tools, your hands, etc., with rubbing alcohol. Empty the mesh bag of its straw contents and spread the straw (straw should be warm to the touch) onto a sterilized surface so that so that the straw layer is 2-3 inches thick.
Step 4: Take handfuls of the mushroom grain spawn and toss it onto the straw until the grains dot the surface of the straw. Work the grain spawn into the straw.
Step 5: Stuff the straw into your cylindrical plastic bag, compressing the straw enough so that the bag is firmly (but not overly) packed. Tie the bag off.
Step 6: Take a nail or a sharp pair of scissors and pierce the bag, making random 1-inch cuts all over the bag, but not to the point where the straw begins to fall out. This is to aerate the bag while keeping a moist environment for the spawn. Wipe the bag down with alcohol to keep it sterile.
Step 7: Place the bag in a shady area indoors (i.e., does not receive direct sunlight) in an area where the temperature is kept between 60 – 75 degrees. Keep the bag moist but not damp, by spraying with a spray bottle filled with water. You should see signs of oyster mushrooms in 2 weeks (the log will turn white), at which time, you can either keep the bag indoors or locate it in a shady part of your yard, protected from the wind and sun and heat. When the caps of mushrooms flatten out, it is time to harvest. Don't wait too long, as the mushrooms can grow past its prime in just 1 day.
For more information on either Biofuel Oasis or Mushroom Maestros, please see www.biofueloasis.com and http://www.mushroommaestros.com/, respectively.
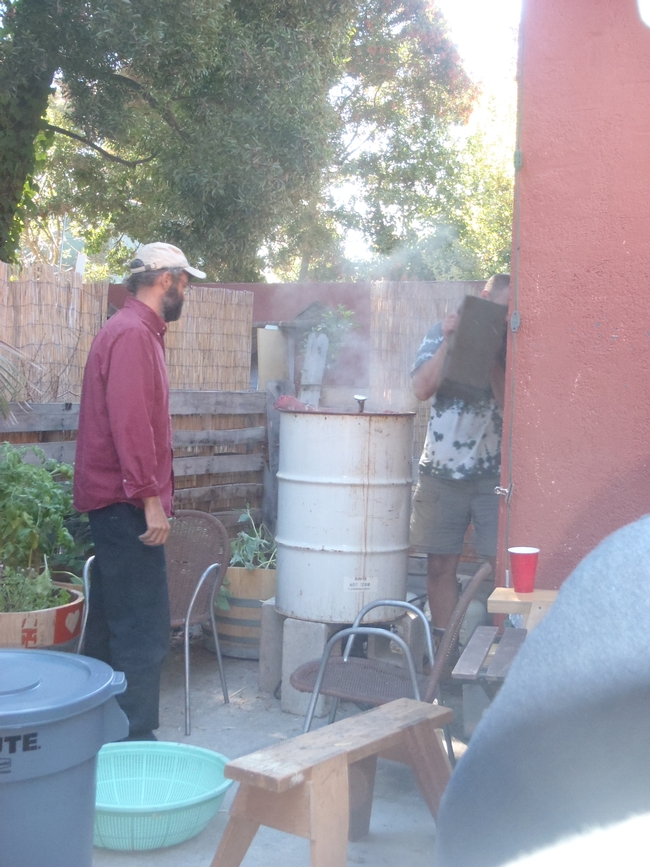
Pasteurizing straw. (photos by Betty Homer)
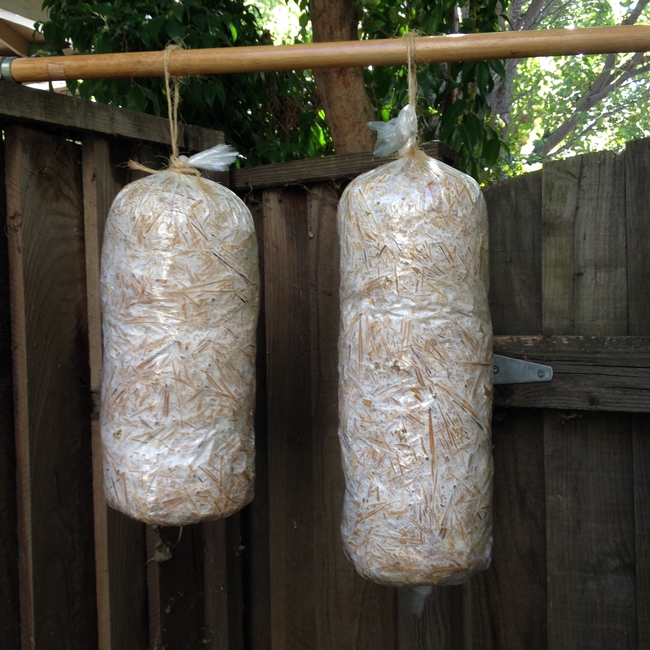
Mushroom logs hung outside after being indoors for 2 weeks.
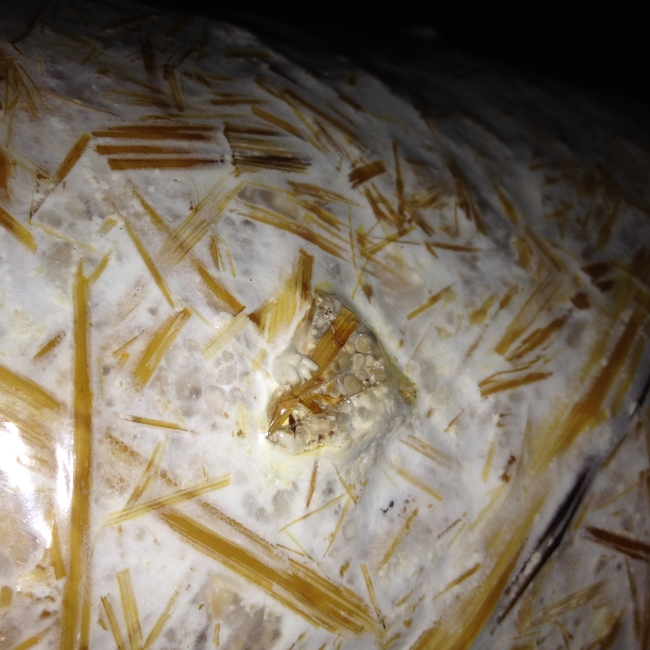
Oyster mushrooms peeping out.
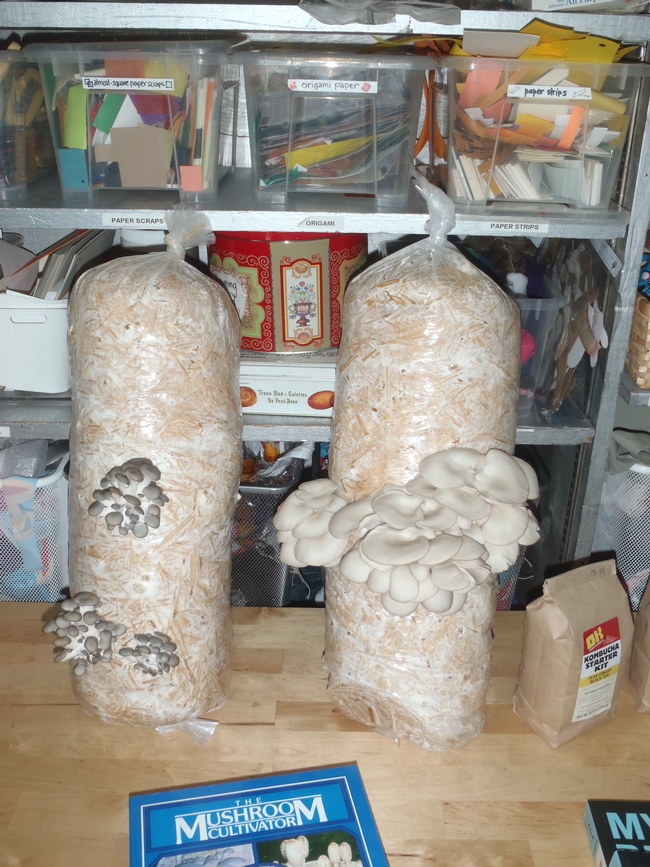
Oyster mushrooms ready to harvest.
Inter-planting Fruit Trees With Veggies
Yes, you can have it all in a relatively small back yard space: Fruit trees and veggies. Our “mini orchard” is on an oblong plot that’s about 25x15’, a sunny plot that came with the house we bought last summer. In that space there are 3 dwarf plums (Prunus spp.), 2 apricots (P. armeniaca), 3 cherry trees (P. avium), 2 peach trees (P. persica), and an apple (Malus domestica), all of unknown varieties. Our fruit trees are about 5 or 6 year old mostly dwarfs (I think), and if not, they got dwarfed anyway by my pruning saw and loppers last December, when I pruned both for shape and fruit production. My rule of thumb with fruit trees is that if it is higher than I can reach, it gets lopped off. This permits easy picking of the fruit and avoids the need for ladders. The pruning and thinning of the foliage, which I do about once per month (see photos) also allows more nutrients to get to the fruit, besides giving those veggies planted in between their 6-8 hours of sun.
The veggies we have include 6 tomato plants (Solanum lycopersicum) in cages, 2 clumps of squashes (Curcurbita pepo), Japanese eggplant (Solanum melongena), bell peppers (Capsicum annuum), a lemon cucumber (Cucumis sativus), 3 hollyhocks (Alcea setosa), and 2 sunflowers (Helianthus annuus). The tomatoes have been so productive we have to give the surplus to neighbors and friends. The eggplant and peppers have been slower to mature but nonetheless very tasty in stir-fries, especially with added portabella mushrooms (Agaricus bisporus) and fresh chard (Beta vulgaris), the chard grown in one of our raised beds in another location of the yard.
And so, another example of when less (space) is more (more intensively gardened).
UC Davis has a publication called The California Backyard Orchard, which you may find useful for tips on pruning, both in the dormant season in during the spring and summer months. See homeorchard.ucdavis.edu.
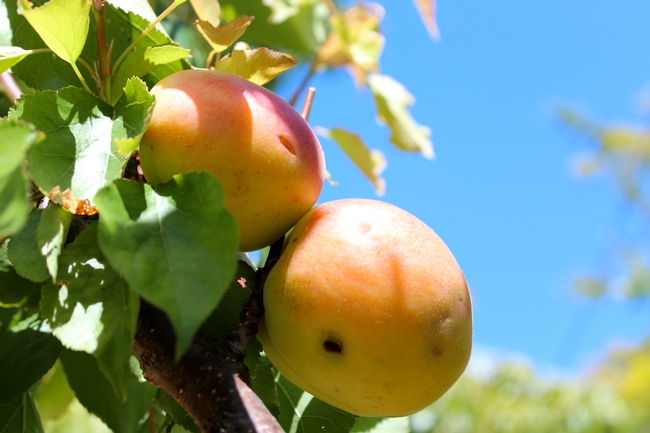
Apricot. (photos by Bud Veliquette)
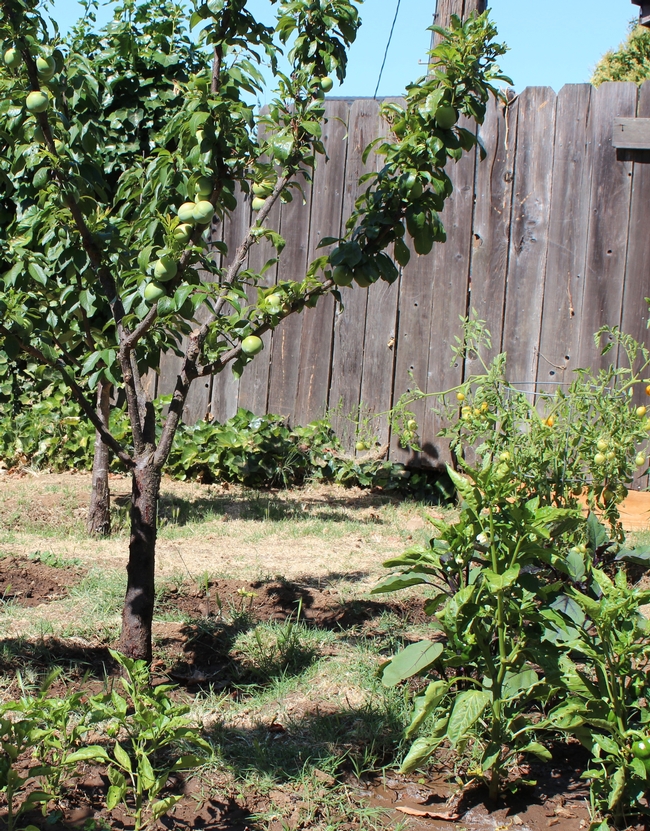
Apple tree, peppers and tomatoes.
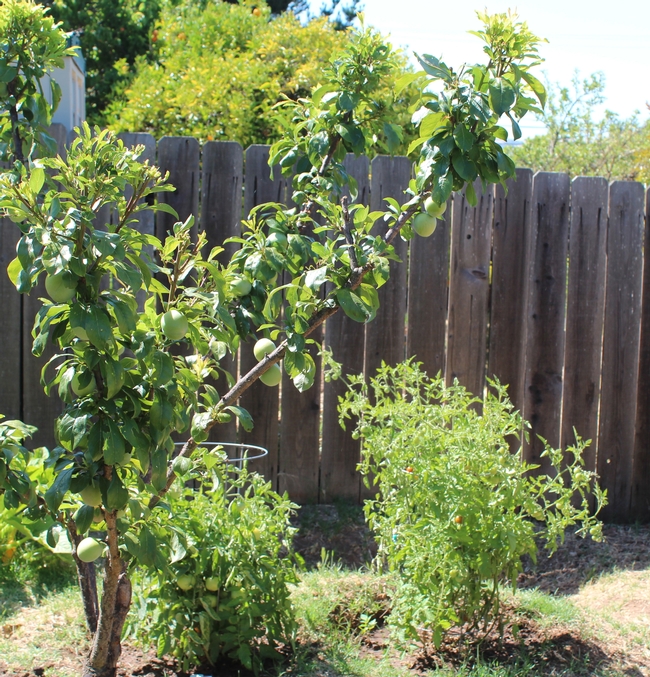
IMG 1082
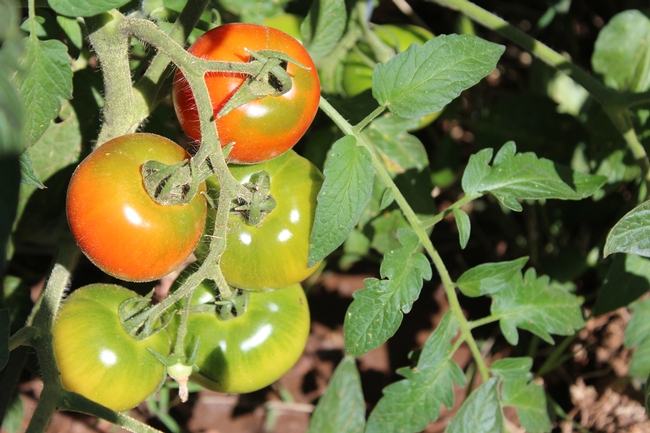
Vine-ripening tomatoes.
Frilly Mushrooms
I just came back from the pacific northwest. I went for two reasons, which were family and mushroom hunting. I found many, but not the one I was looking for. My favorite is Trametes versicolor , commonly called Turkey tail bracket fungus. This little powerhouse is so pretty! It does the whole neutral monochromatic color scheme thing all by itself. It's quite common, which just baffles me even more that I couldn't find it up north. Not only does it resemble a frilly fairy skirt, or the tail of a turkey, it's ecologically amazing. For starters, it can be used to clean up collected pollutants from disastrous oil spills and is well known in Asia for use in cancer treatment.
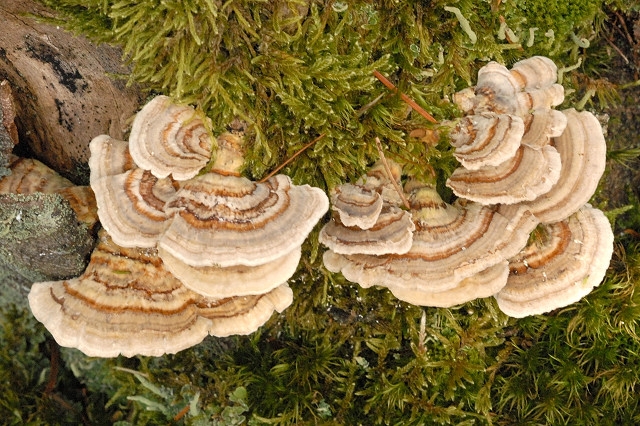
Trametes.versicolor4.-.lindsey
Mushroom collecting impacted by sudden oak death
A Northern California mushroom hunter blames sudden oak death for a dramatic decline in wild golden chanterelles, according to a feature story in the East Bay Express, but the article points to myriad pressures on landscapes that used to produce the edible fungi.
Mushroom enthusiast Todd Spanier told writer Alistair Bland that 10 years ago he could harvest nearly 200 pounds of golden chanterelles from a handful of patches.
"Now, I can go to the same canyons, do all the same hikes to all the same patches, and collect maybe five pounds of chanterelles," Spanier was quoted.
Among other things, Spanier blames sudden oak death.
"In places the forest looks like a checkerboard of dead trees," Spanier said.
The story outlines the other landscape impacts that may be partly responsible for the decline in wild mushrooms:
- Grazing cattle, which gather in the shade of oaks and trample seasonal mushroom patches
- Wild pigs, which tear up the soil beneath oaks rooting for acorns
- Suburban sprawl and development
The tanoak — not actually an oak but still important for mushrooms — have meanwhile been decimated by sudden oak death in its native range along the central and north coasts of California. UC Berkeley SOD expert Matteo Garbelotto believes the tanoaks could disappear from some areas altogether, the article said.
Mushroom hunting is illegal in state and national parks and a permit is required for mushroom hunting in national forests. Bland said, however, that many avid collectors regularly break such laws. Spanier suggested there's a primal drive for collecting the rare delicacies.
"Wild mushrooms are our last connection to our ancestral hunting and gathering roots, and cultivated mushrooms can't replace that," he is quoted in the story. "If and when we lose the California live oak and tanoak, it's going to be tragedy in so many ways. It'll be a culinary loss, a cultural loss, and an ecological and environmental loss."
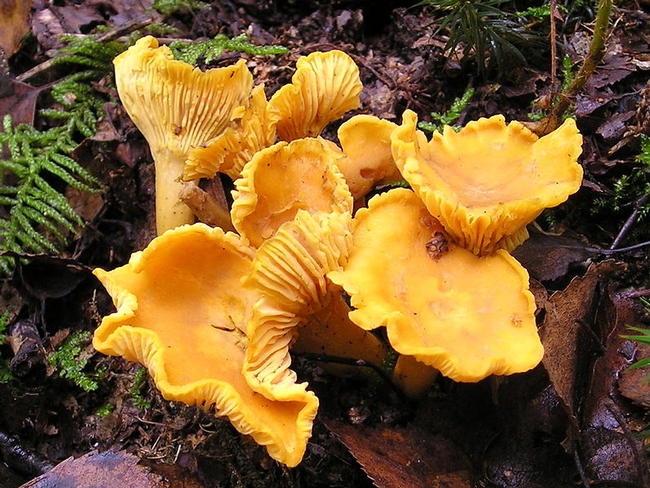
Wild golden chanterelle mushrooms. (Photo: Wikimedia Commons)

