

UC Blogs
Lovely Lavender Lavatera
I went out to my backyard this morning to see if the rain and heavy winds we had did any damage to my plants. Everything look ok, soggy but maybe the sun will shine and dry things out some.
A pleasant surprise greeted me, my tree mallow (Lavatera spp.) is starting to bloom. I planted it last year from a cutting that I got at our plant exchange about two years ago. I took about 3 cuttings home and put them in some potting soil and waited to see if they would take. The larger one did, the smaller ones did not. Once it starting growing as was about 12 inches tall I transplanted it to the garden. I put the tree mallow in a spot where it would have room to grow, as I had seen one that looked like it would take over, and I didn’t want that to happen. But it looks like it has a mind of its own, and is taking over that spot and one nearby it.
This is the first time it has bloomed, but it has stayed green all year, which is nice when most things look doormat. Even with this Lavatera blossom in the picture showing white with light pink it is actually a very light pink, with a darker pink around the center and the stamen is light yellow.
Some tree mallows are suppose to be rose shaped mine grows face down and to me it looks more like the old fashion hollyhocks that our parents might have grown. All I know is that this plant seems to grow inches over night and soon will take over in height and width, so after it blooms I plan on pruning it down to an average height.
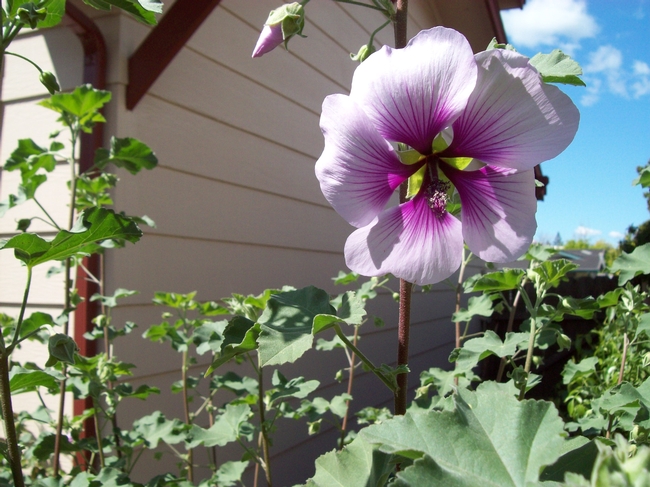
Lavatera in my backyard. (photo by Betty Victor)
Love at First Flight
Spring has definitely sprung.The carpenter bees (Xylocopa tabaniformis orpifex) of the Central Valley have emerged and are creating their own little...
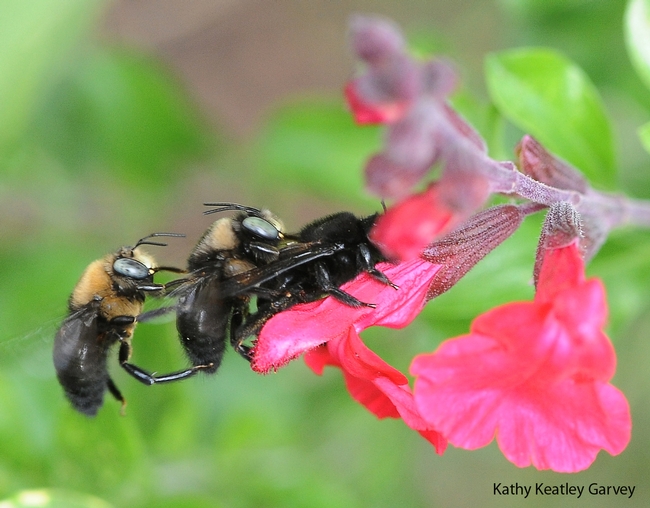
Two male carpenter bees, Xylocopa tabaniformis orpifex, with a female on salvia. (Photo by Kathy Keatley Garvey)
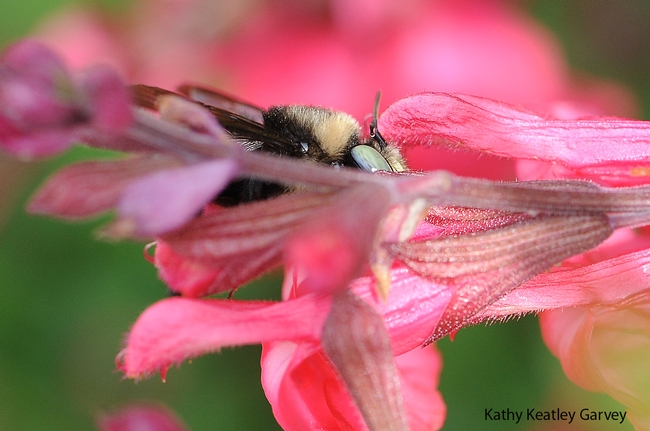
Peek-a-bee: A male carpenter bee, Xylocopa tabaniformis orpifex, peeking through salvia. (Photo by Kathy Keatley Garvey)
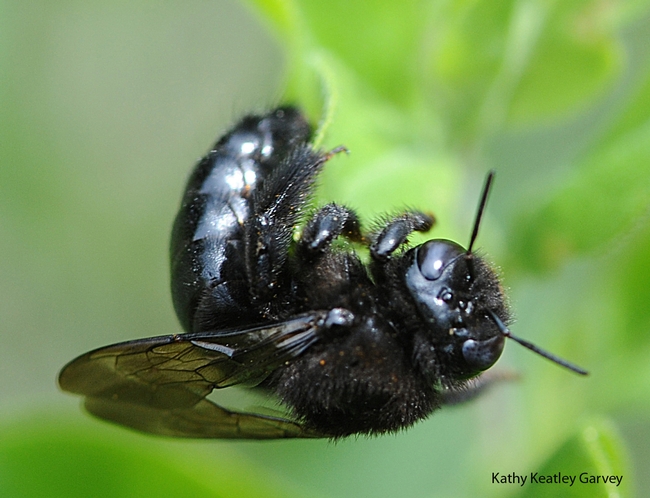
Close-up of female carpenter bee, Xylocopa tabaniformis orpifex. (Photo by Kathy Keatley Garvey)
Ideas from the San Francisco Flower & Garden Show
I love to go to flower and garden shows. It's fun meeting new plants and seeing what's popular each year. This year's San Francisco Flower and Garden Show was no exception. The most frequent plants we saw in displays this year was the Strawberry Tree, Arbutus unedo 'Maritima' and various Euphorbias. But after a few years of visiting, I realized there was more to be gotten from the experience. I began paying attention to how they were making everything look so beautiful and tried to pick up gardening and display tips.
This year I was especially impressed with two easy ideas I saw there. The first used old barrel staves (possibly from old wine barrels). They nailed each end of the wooden stave to a wall, so that the stave was horizontal. Because of the natural curve in the stave this gave them just enough space to tuck 4 by 4 inch pots behind it. They put several of these in a vertical column and made a very inexpensive and cute display area.
The next idea is even easier. We all know that mulch is good for our plants,; it helps prevent moisture loss. Some of us may even have tried using stones or gravel as mulch in our potted plants. But these designers took it a step further, and laid out the stones in a pattern. This was a real eye-catcher.
There will be more garden shows coming up, so there will be more to learn.
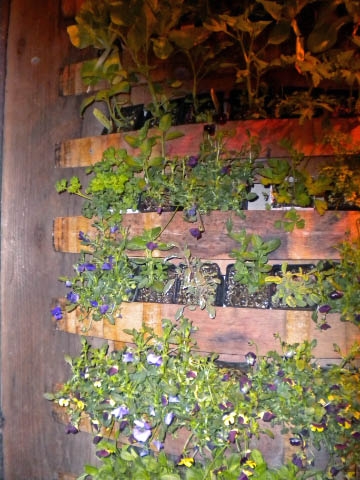
4 x 4 pots in staves. (photos by Karen Metz)
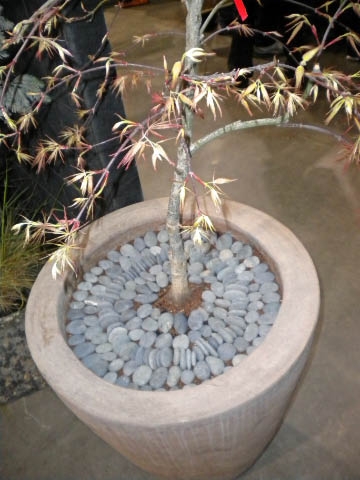
Rocks placed decoratively in a container.
Rescue 911
Okay, I’ll admit it. I have a soft spot for honey bees. Today I fished out some thoroughly drenched honey bees from our swimming pool.Indeed, the...
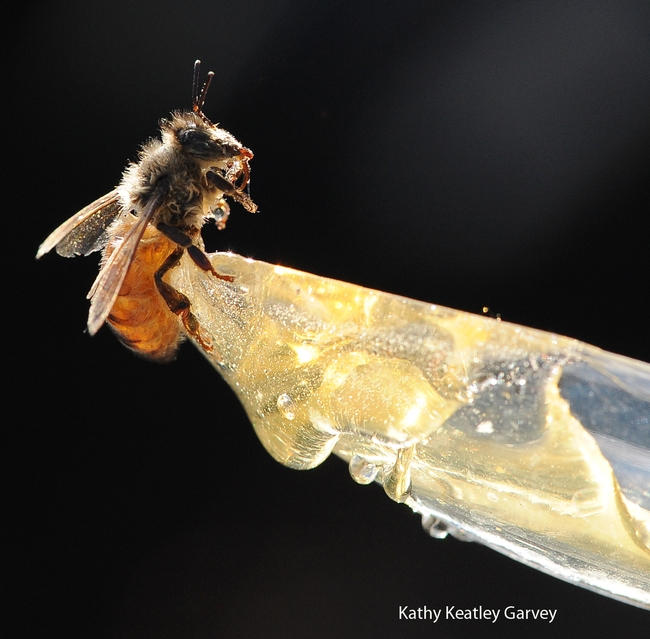
Drenched honey bee gets ready to sip honey from a plastic spoon. (Photo by Kathy Keatley Garvey)
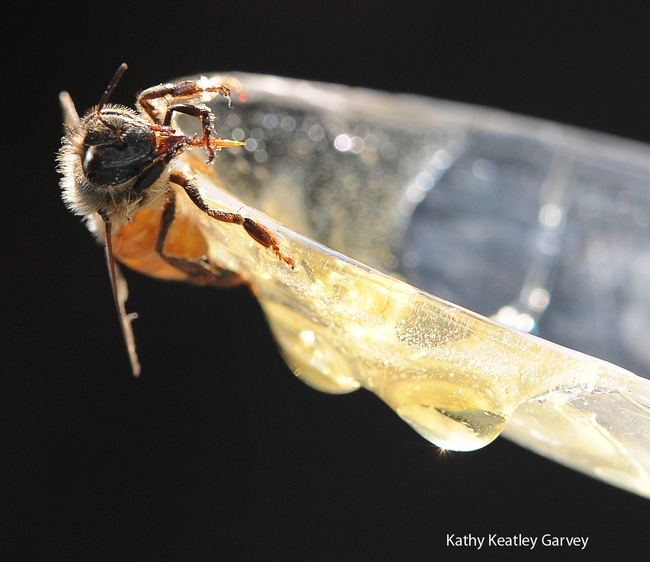
Honey bee cleaning her tongue. (Photo by Kathy Keatley Garvey)
Ladies Class or Lady Class?
A couple of weeks ago on my way through the check out at Home Depot, I noticed a flyer for a “Ladies Class” on Vertical Gardening. It was only scheduled for an hour and promised fun and most importantly snacks.
These folks are to be commended. There were four demonstrators and a big group of folks that included me, myself, and I. Yep, I was the only one! These presenters carried on in a professional manner and still demonstrated the way to construct and plant the “garden”.
Lucky me, since I was the only one who attended, I won the raffle which was the garden that they had just constructed!
Below are some pictures of how the “vertical garden” was put together:
- Box constructed out of redwood, with a hole drilled for drip line connection. Then it was lined with plastic and a drip line inserted, with a fitting for a hose on the outside.
- Soil was added.
- Landscape cloth and lattice added to contain soil, but allow for air and water.
- Holes were sliced into the fabric afterwards and then planted with marigolds and strawberries.
Ta-Da!
NOTE: The Master Gardeners do not support or endorse Home Depot or any of its products.
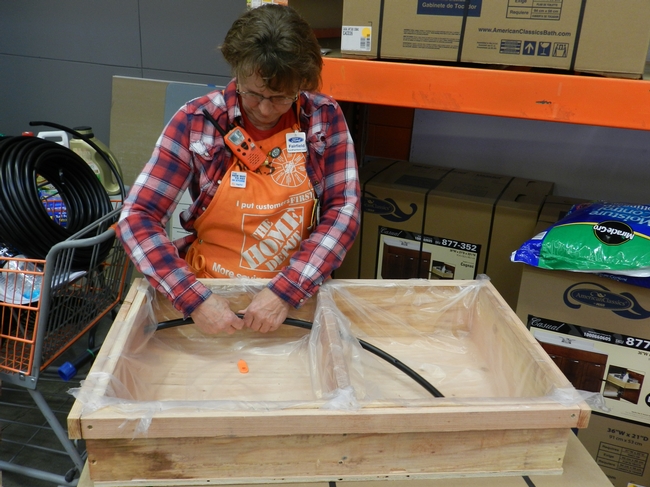
Lining box with plastic and insert drip line. (photos by Patti Brantley)
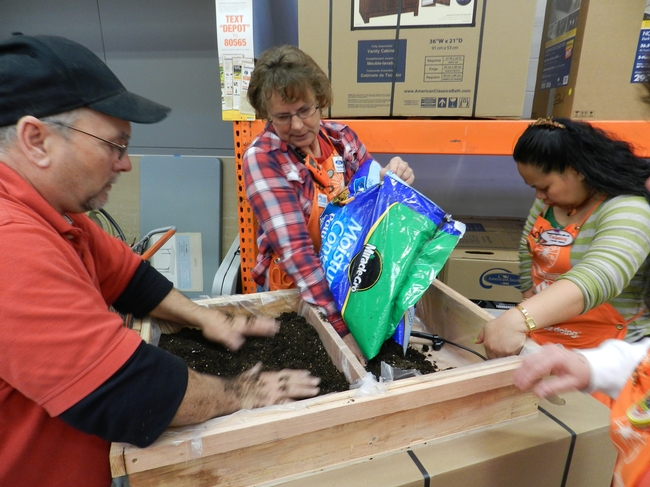
Filling planter box with soil.
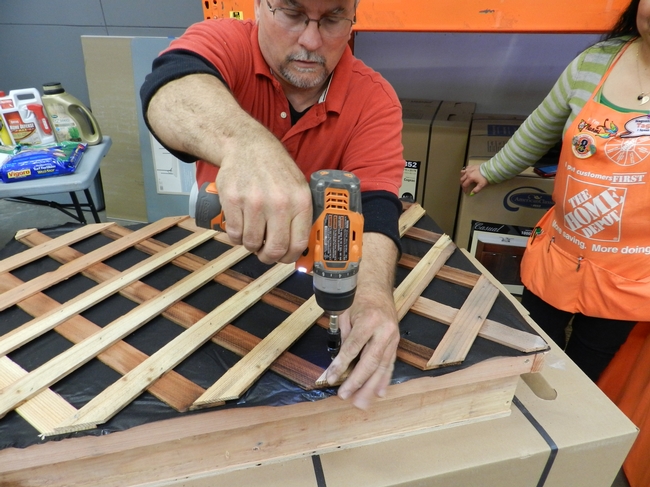
Box covered with landscape fabric and lattice.
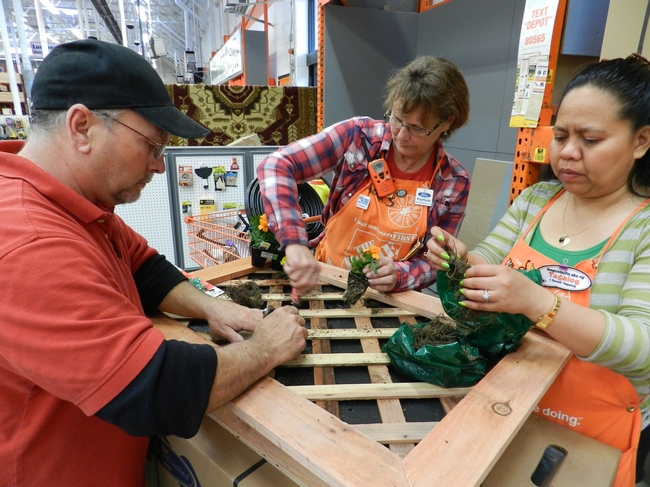
Planting into the landscape fabric.
