

UC Blogs
Lovin' the Zinnias
Orange zinnias not only brighten our autumn days but glorify our gardens. And when there's a bug on the zinnias, all the better. This insect,...
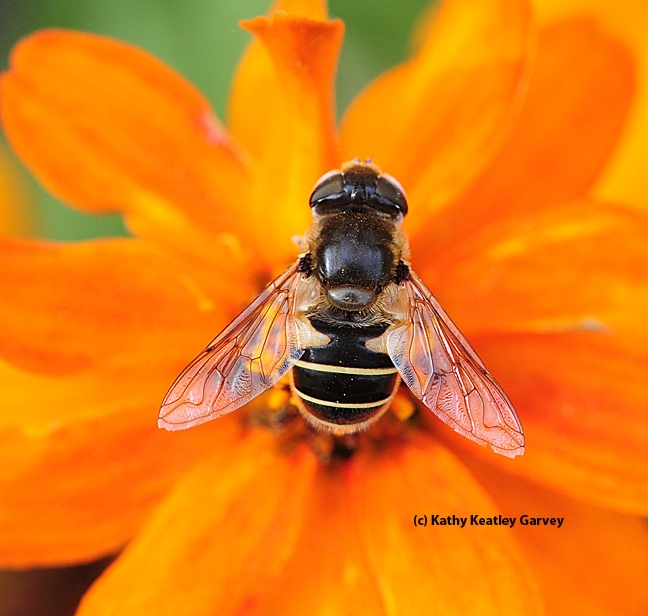
Hover fly, Eristalis hirta, on zinnia. (Photo by Kathy Keatley Garvey)
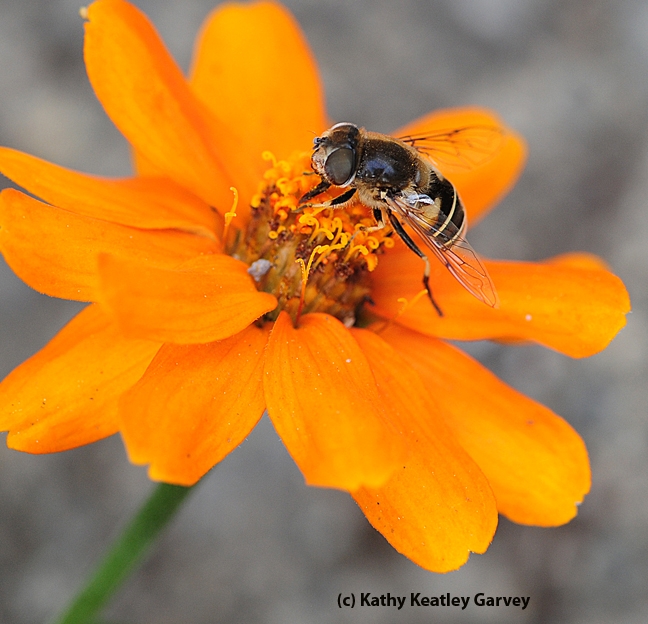
Side view of Hover fly, Eristalis hirta, on zinnia. (Photo by Kathy Keatley Garvey)
Small farmers find new marketing opportunities in San Francisco

The story focused on a tour last week organized by UC Cooperative Extension and the UC Agricultural Sustainability Institute intended to help small growers find new avenues to sell their products.
"Everyone wants to do business with them," said David Visher, a project analyst who helped organize the workshop. "We're not advocating that they choose processors over farmers' markets. We're just trying to show them their options and introduce them to the right people so they can make their own choices."
One of the growers on the tour, Emma Torbert, told the reporter she returned to her farm near Davis with a head full of possibilities.
Read more about the tour in the UC Food Blog post Cultivating connections between farmers and food buyers.
Homegrown/Backyard Oyster Mushroom Cultivation-Part II
Last month, I blogged about cultivating oyster mushrooms in the backyard by inoculating a cylindrical plastic bag containing straw, with mushroom spawn. I am happy to report that my mushroom log project was a success and have enjoyed literally, the fruits of my labor.
This month, I will be discussing another simple method of cultivating culinary mushrooms in your backyard. The variety that I am currently experimenting with is Stropharia rugosoannulata, commonly known as the wine cap mushroom. Although creating the substrate and environment to grow wine cap mushrooms is fairly simple and straight-forward, it may not be until a year or more before you know whether you are successful (contrast this with cultivating oyster mushrooms discussed last month, which will mature fully in a month or less from the time you assemble the mushroom log).
Below are instructions on how to cultivate wine cap mushrooms at home.
Materials List:
1. Large piece of corrugated cardboard (e.g. from a shipping box or grab several boxes from a warehouse store);
2. A large basin, clean garbage can, or plastic tote with which to hold water to soak the cardboard;
3. Wood chips (can be obtained from local arborist looking to dispose of his/her tree waste);
4. Wine cap mushroom spawn (can be purchased on-line); and
5. 1 to 2 plastic kitchen trash bags.
Directions:
Creating Cardboard Spawn
Step 1: Soak cardboard for 30 minutes until the cardboard layers separate easily to reveal the corrugated layer.
Step 2: Shake off excess water from cardboard. Cardboard should be damp, but not dripping wet. Separate cardboard by tearing back top layer to reveal the corrugated layer.
Step 3: Sprinkle and distribute the spawn all over the cardboard until a uniform, thin layer forms.
Step 4: Roll up the cardboard at the short-end so that it resembles a scroll. Note that the moisture level in the cardboard is similar to a wrung-out sponge or something close to it. Place the rolled-up inoculated cardboard into a kitchen trash bag, keeping the bag open so that the inoculated cardboard can breathe.
Step 5: Leave the plastic bag containing the rolled-up cardboard in a warm place (i.e., room temperature), out of direct light. Check every couple of days to see whether your cardboard is still sufficiently moist (moisture will evaporate over time). If the cardboard has dried out some, just spray some water on it, enough to keep it moist.
Step 6: After 2 weeks, the cardboard should be fully colonized. You can tell by unrolling the “scroll” and examining the cardboard for white mycelium threads, which form various spider web-like patterns. When it is fully colonized, transplant it outdoors in a shady spot by layering it between woodchip layers (directions to follow).
Creating a Woodchip Bed Using Cardboard Spawn
Step 1: Soak wood chips in clean water until thoroughly saturated.
Step 2: Choose a shady place in your garden and rake aside the topsoil in that spot.
Step 3: Set down one layer of your inoculated wet cardboard.
Step 4: Shovel a layer of wood chips 1-2 inches deep on top of the inoculated wet cardboard.
Step 5: Set down another layer of your inoculated wet cardboard on top of the wood chip bed (think of creating lasagna layers, alternating between your inoculated wet cardboard and wood chip layers).
Step 6: Finish the bed by shoveling another layer of wood chips on top of your inoculated wet cardboard.
Step 7: During the course of the year, keep your wood chip bed moist but not overly saturated. Avoid having water pool or puddle in or around the wood chips.
Step 8: Wait the year for results.
Finished product after assembling "lasagna" consisting of alternating between layers of wood chips and wet cardboard inoculated with mycelium spawn. (photo by Betty Homer)
All the Way from Down Under
One of the most prominent and distant--as in far away--visitors to the Häagen-Dazs Honey Bee Haven, the half-acre bee friendly garden...
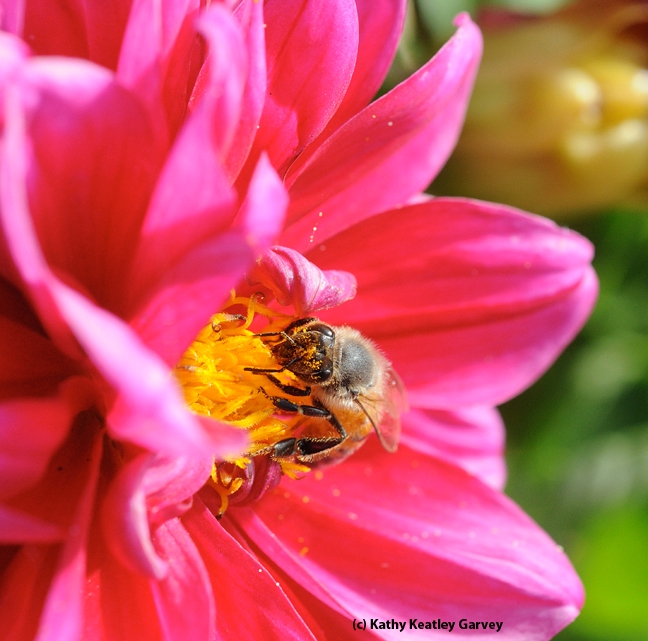
This photo of a bee foraging on a zinnia, taken in the Haagen-Dazs Honey Bee Haven, graces the front and back covers of "Bee Friendly: A Planting Guide for European Honeybees and Australia Native Pollinators." (Photo by Kathy Keatley Garvey)
Broccoli Success
Recently, in Late September, we harvested our first broccoli (Brassica oleracea) head of the season. It tasted so good! I planted a 4” transplant in early September and it really took off. At the same time I planted a six pack of ‘Green Comet” and as we head into the third week of October, we are picking them one by one. Of all the winter vegetables, broccoli is my favorite because it just keeps on producing. First the large center head then a week to ten days later the side shoots. The shoots get smaller and smaller with each harvest. Finally the shoots are so small they are hardly worth cooking so I just throw them into salads. A bonus of broccoli is the leaves are tasty, too. We add them to our vegetable smoothies.
The biggest problem I have encountered growing broccoli is the imported cabbage worm. When I see white butterflies with one or two spots on their wings fluttering around the garden I take heed! It is the Cabbage Butterfly (Pieris rapae) laying eggs on the underside of the leaf. Males have one spot on each wing and females have two. The larvae are little velvety-green imported cabbage worms so named because they feed on members of the cabbage family (Cruciferae), and believe me they can do lots of damage to the leaves plus get right into the heads. Over the years I have tried a number of methods to deal with the little pests. First I ignored them. That didn’t work out so well as the leaves had big holes in them and the florets harbored little green worms. I picked them out as best I could before I cooked the broccoli but occasionally I missed one and it showed up as a brown cooked worm on the plate. Yuck! My family did not appreciate them!
My second method was to pick off the eggs on the underside of the leaves. They are little yellowish bullet shaped single eggs and fairly easy to see. That was a lot of work and I missed some which left me with the same problem as method #1. So, one year I tried method #3. I used row covers to keep the butterflies out. But, a few sneaky butterflies got under the cover and had their way with my broccoli. I didn’t realize I had a problem until it was too late because I was sure my precious plants were protected and therefore didn’t check the leaves for eggs. It turned out worse than method #1or #2. Now I use method #4 and the broccoli is beautiful with minimal holes in the leaves and no little green worms in the florets or on my plate.
Method #4. I don’t like the hassle of mixing and spraying pesticides on my garden, but I have finally zeroed in on a successful method to deal with the little green caterpillar/worms. When I see the white butterflies I know the green worms will follow in three to five days and they will take two to three weeks to mature so I mix the liquid concentrate B.t. (Bacillus thuringiensis) and spray. B.t. is an organic product that I first used way back in the 70s when I started vegetable gardening (it was a powder then). I spray a very fine mist on the leaves once every 5 to 7 days while the butterflies are active. I try to be vigilant as there can be two to four generations in the spring and fall.
Here is a little secret. Use use Spray- Grip along with B.t. because the spray will not bead up and run off the leaves but will adhere to the leaves and turn them a darker green while the spray is wet so you know which plant you have covered. B.t. is a natural bacterium and needs to be used up the day it is mixed. It only kills the caterpillars or worms feeding on the plant and will not harm birds, earthworms or other beneficial insects such as honey bees and ladybugs. Plus, it can be used up to and on the day of harvest. There is only one thing that would make this method easier and that is to be able to purchase the spray pre mixed and not have to use it up each time. Well, guess what? That is exactly what is coming this spring to our nursery. That is a product I will be watching for to ensure success with broccoli.

Female Cabbage Butterfly (Pieris rapae). (photos by Libbey McKendry)
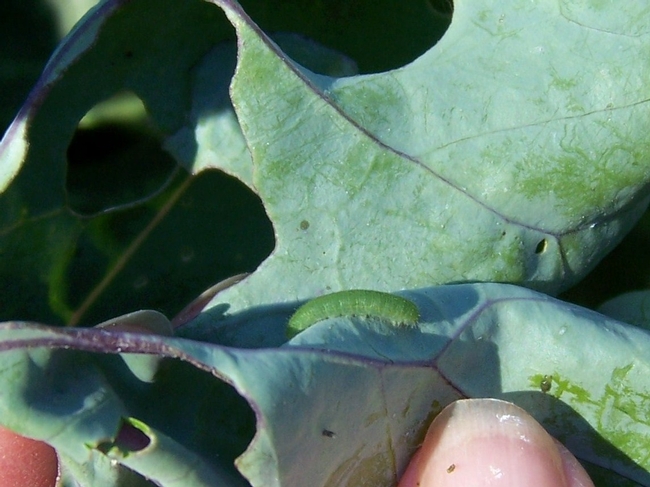
The larvae are little velvety-green imported cabbage worms.
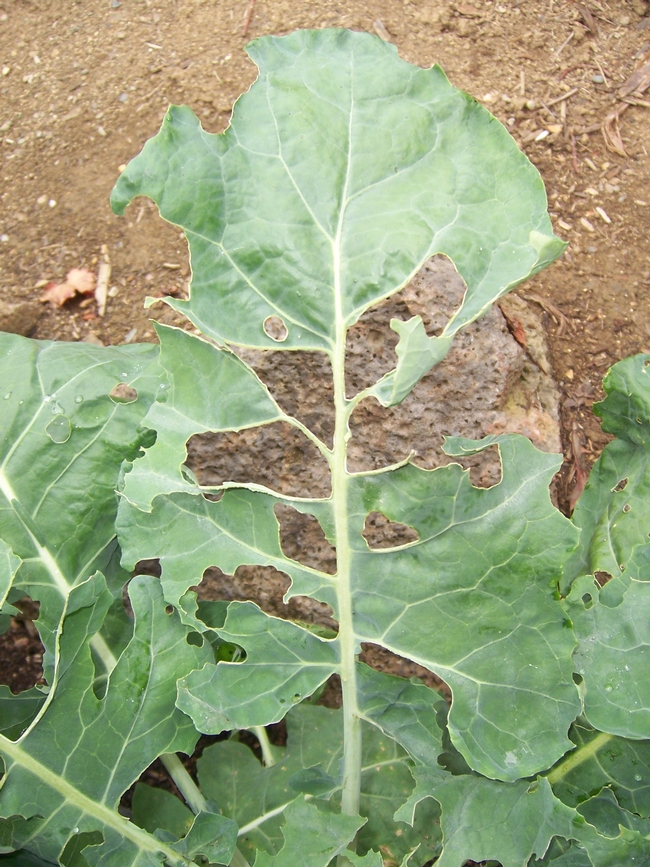
Leaf damage when left alone.
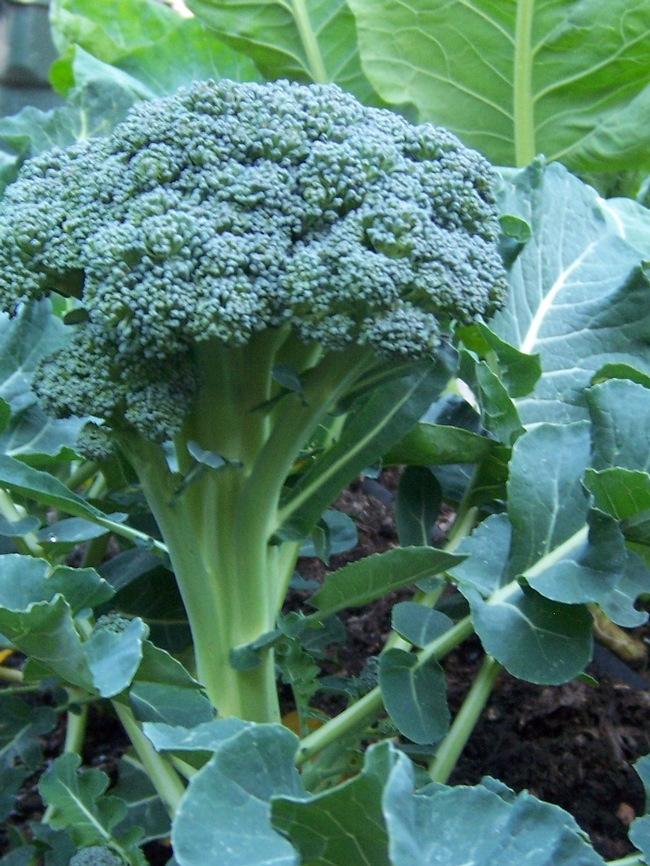
Broccoli Success!
